Sungold tomato and chickpea salad, for the end of summer

A simple salad made with sungold tomatoes or cherry tomatoes, red onions and chickpeas. My favourite way to serve this is with slices of fresh sourdough bread, generously buttered.
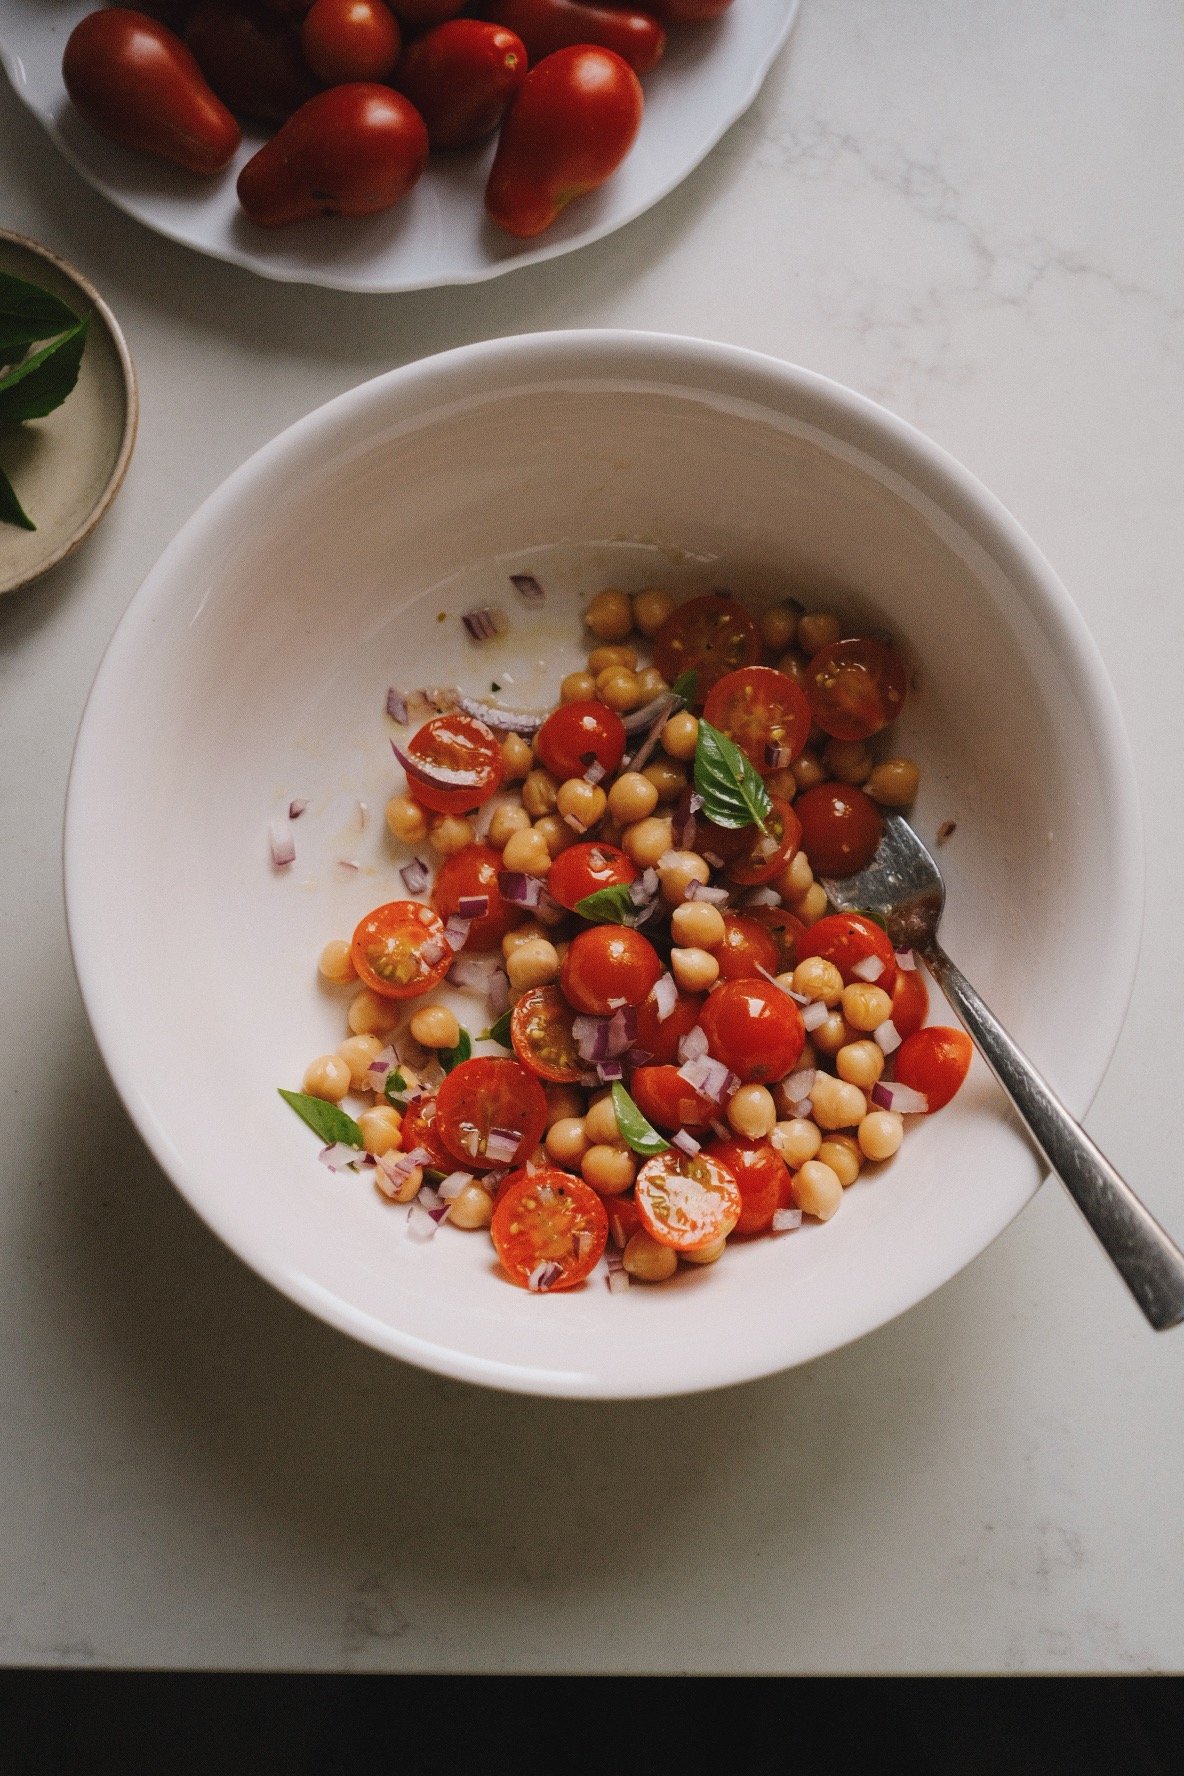
Sungold tomato and chickpea salad

We are standing at the very edge of summer. It’s the end of August, the peaches and plums are here, the cool mornings. There is softness in the air, the light. The first leaves have begun to colour away from green.

I’m not quite sure I am ready, but it feels like nature is. 

We drove out to our local farm the past week, and though the tomato harvest hasn’t been abundant this year, I managed to get some beautiful heirlooms and two boxes of sungolds. 

If you’re not familiar, sungold tomatoes are orange-coloured cherry tomatoes, the sweetest you’ve ever had. They taste quite literally like eating sunshine in tomato skin, and grow in heavy clusters on tall plants and are as beautiful as they are productive. I used to grow them in raised beds in my backyard and my son would harvest clusters of them off the plants on warm summer evenings. The larger, colourful heirlooms have been put aside for a galette, but the sungolds went into a very simple salad that I am offering you today. 

This salad began life as a simple dish of dressed tomatoes that I wanted to photograph. I love shooting colourful food, and I wanted to capture the vibrant beauty of the sungolds, as I’m never quite sure whether I’ll find more next week when I drive to the farm again. So I set up in my studio, then styled and photographed them, all done in a matter of a couple hours, my creative practice for the day finished.
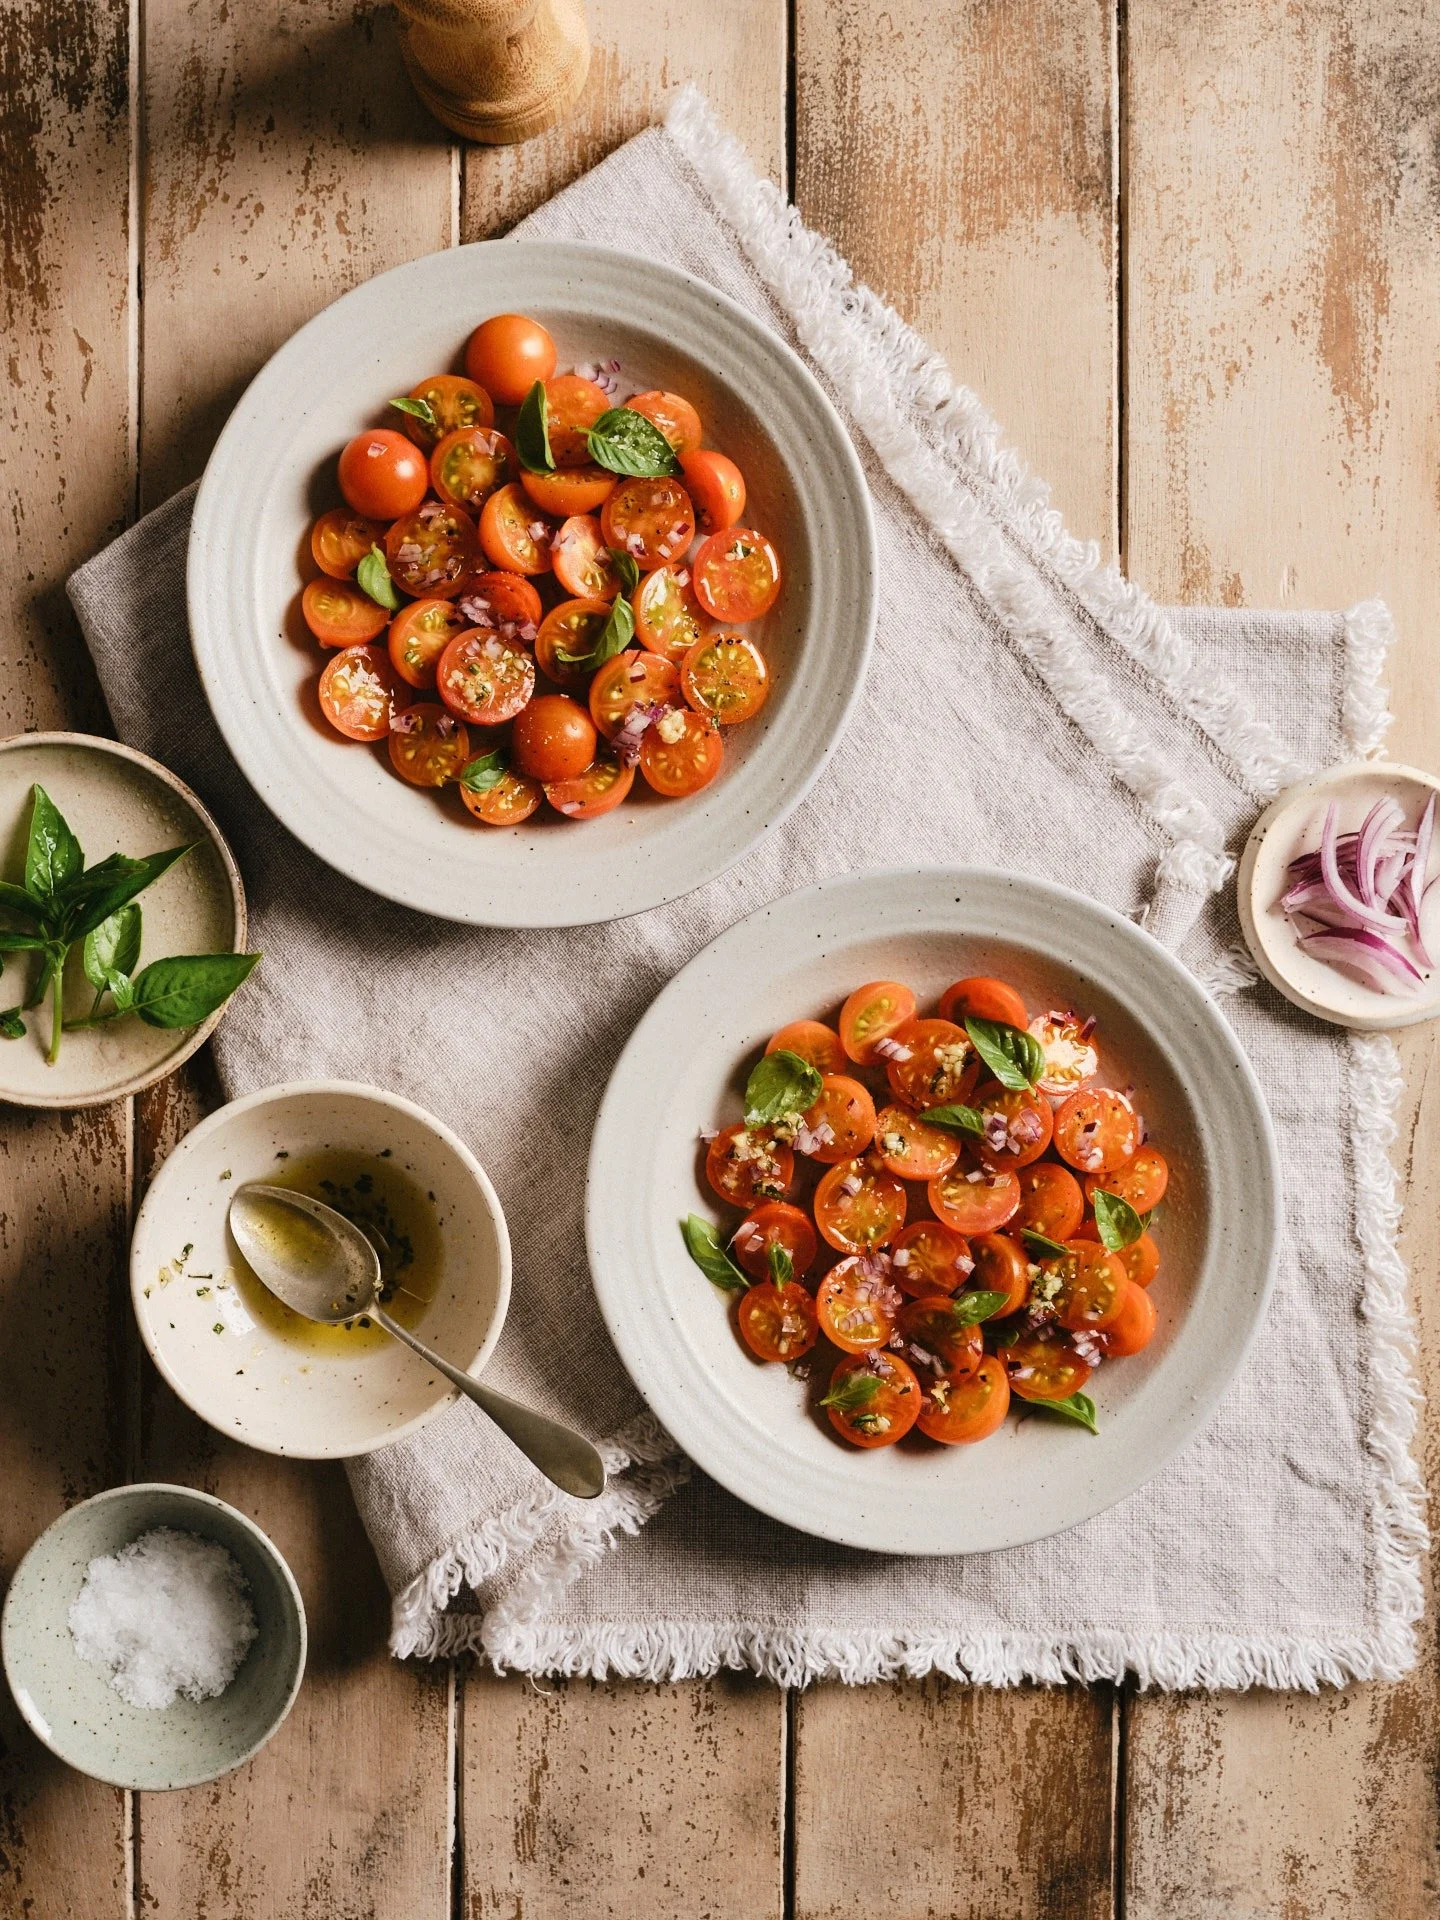
Two plates with orange cherry tomatoes, garnished with red onions and basil leaves

The sungold tomatoes, styled for the camera

But the sungolds had more to give. Back in the kitchen, I transferred them to a large bowl, and on a whim, started adding a little of this, a little of that, and before I knew it, I had a whole salad made. The family came in the kitchen and enthusiastically dug in taste-tested, until nothing was left for me. I remade it twice since, substituting regular cherry tomatoes for the sungolds and I can report, it’s just as good. I hope you try it. 


Recipe notes and substitutions

Beans, chickpeas and lentils are the backbone of my pantry and we eat them constantly, either whole or blended into hummus, pâtés or creamy mashes that offer substance and heartiness to most of my lunches and dinners. Open my fridge on any given day, and you’re very likely to find a jar of home cooked beans or chickpeas, and on the counter there is a bowl with soaking beans every few days. 

I don’t find it onerous to cook my own because I have an electric pressure cooker, but in a pinch, when we’re otherwise busy, I’m more than happy to use canned, as their convenience can’t be beat. 

Use what’s most handy to you, but as always, quality matters, since there are so few ingredients. With that in mind, some more helpful bits: 

  • the sungolds were terrific in this salad, but when I ran out, I simply made it with regular cherry tomatoes. Keep in mind, however, that sungolds are very sweet, so choose a sweet tomato that you love eating even on its own. You can even make it with regular sized tomatoes just be sure to cut them into 3/4-inch (2cm) chunks first. 

  • if you don’t have pine nuts, you can use sliced almonds instead. The idea is to create a bit of textural interest in the salad, instead of having just soft veg in there. 

  • I used lemon basil from my garden; imagine lemon balm and basil mixed together, and you get lemon basil. It’s incredibly fragrant, and worked really well, but Genovese basil, which is the variety most commonly found at the store or markets, works very well here.

  • if your tomatoes are on the tart side, use less white whine vinegar, a few drops might be all you need.
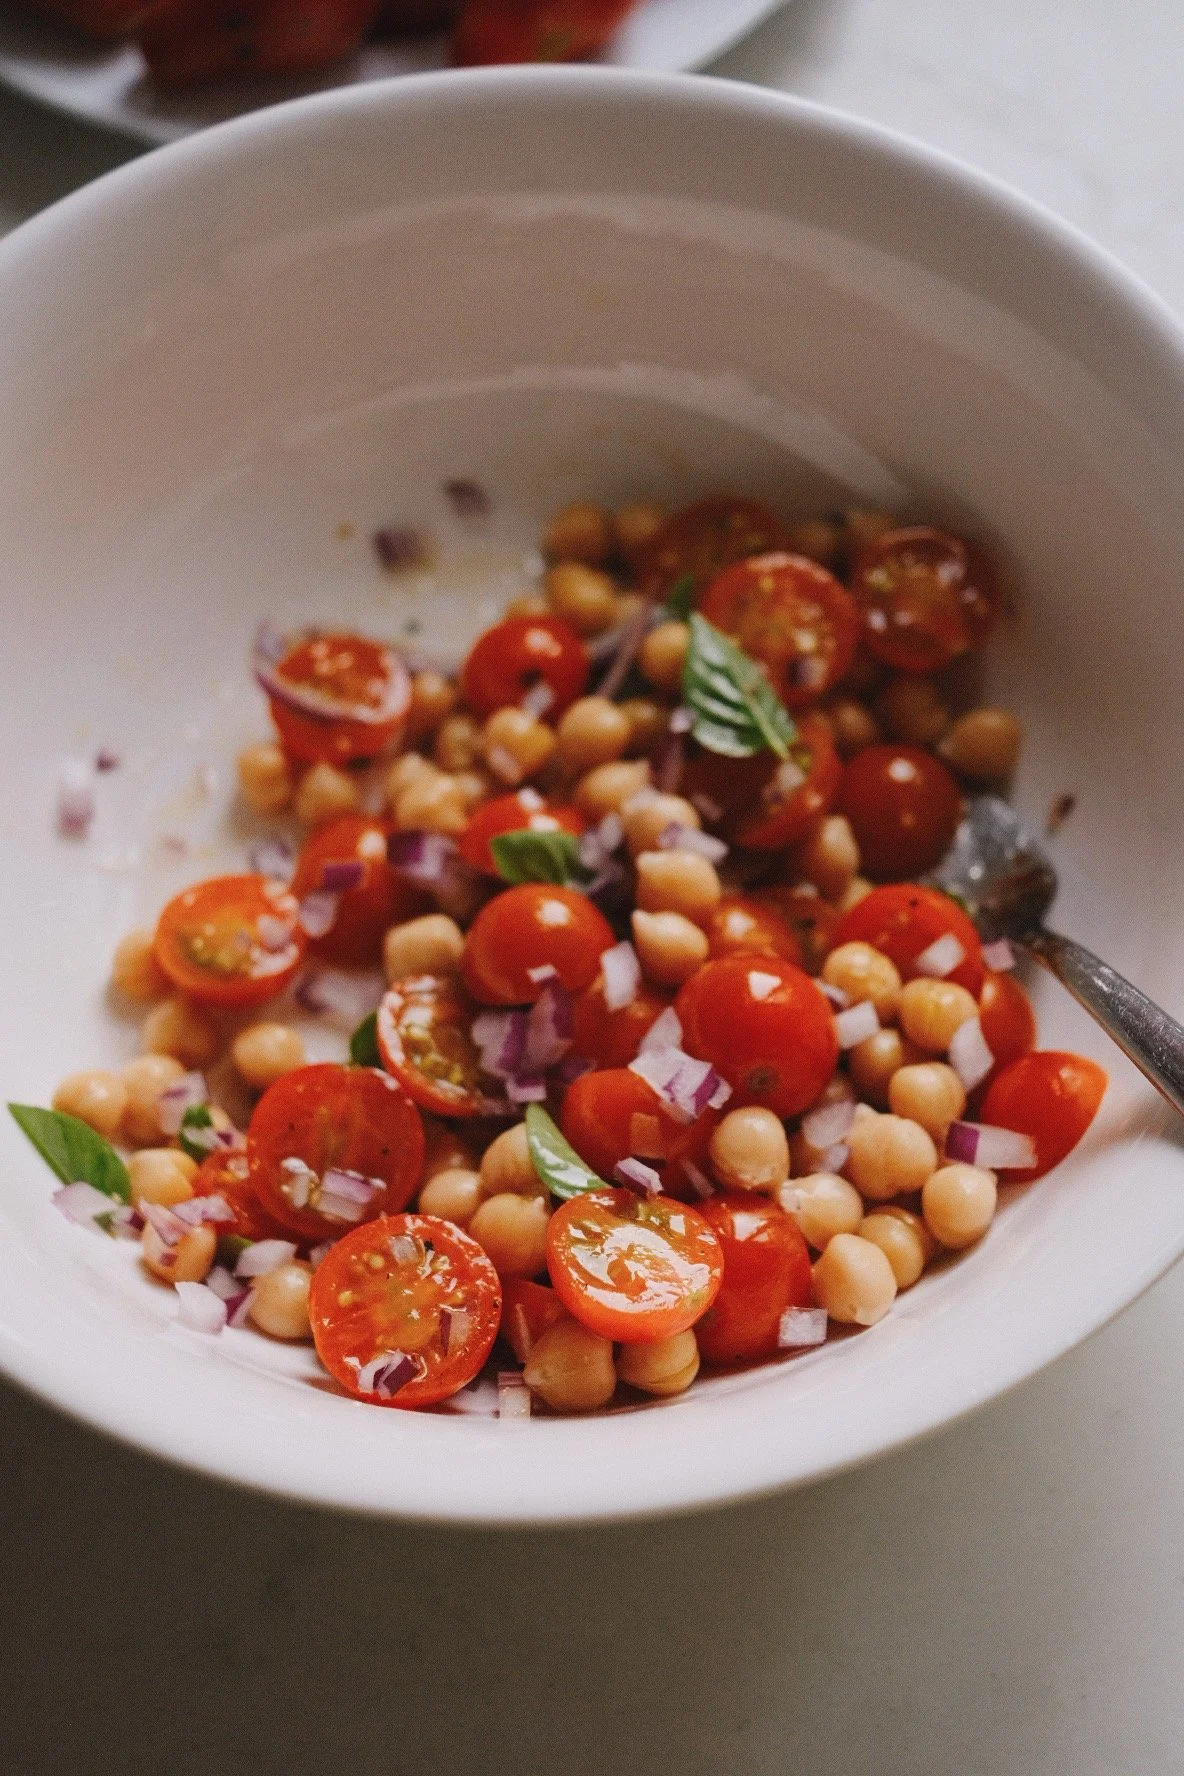
So much texture and vibrancy in this simple salad

Sungold tomato and chickpea salad

Yield: 2 servings

Equipment:

  • cutting board and knife

Ingredients:

  • 260 g chickpeas, drained and rinsed

  • 300 g sungold or other cherry tomatoes, halved

  • 1/4 of a small red onion, cut into small dice

  • 10-12 basil leaves

  • 3 tablespoons pine nuts

  • 1 tablespoon extra virgin olive oil

  • 1/2 teaspoon fine sea salt

  • 1/2 teaspoon white wine vinegar

  • 2-3 grinds of black pepper from your pepper mill

Method:

  • To a large bowl, add the tomatoes and the chickpeas, then the diced red onion, and give it a gentle mix. Set aside.

  • On a cutting board, chop the basil leaves and pine nuts together, until they resemble large crumbs.

  • To the bowl with the tomato and chickpea mixture, add the basil and pine nut crumbs, the olive oil, salt, white wine vinegar and the 2-3 twists of black pepper. Stir everything together gently, without breaking up the tomatoes too much. Taste and adjust for salt and acidity, if needed.

  • Serve immediately, with slices of sourdough bread or alongside a cooked grain like millet or quinoa.


If you’re looking for more tomato goodness, try my Roasted cherry tomatoes with white beans recipe. And if you want to make sourdough bread to serve alongside this beautiful salad, find the recipe for my favourite einkorn sourdough loaf here.

Until next time!

Green beans with whipped feta

Steamed green beans are dressed in a light vinaigrette, then dolloped on a creamy-salty spread made with feta cheese. A low-effort dish, great as a vegetarian main with chunks of your favourite bread, or as a side at your next gathering.

Steamed green beans on a bed of whipped feta cheese

If you cook, you can’t not love the summer months. The markets are bursting at the seams with produce – and not the sad, looks-like-it’s-been-dropped-from-a-plane produce either, that we find in stores in winter. Now we’re spoiled with lush lettuces (use them in this easy salad), tomatoes dripping with sweet juice, zucchinis of all shapes (try the funkily shaped pattypan squashes if you haven’t yet). 

Beans are abundant too, snappy with freshness, fully in season. I picked up some local French green beans at the store last week. They are also called haricots verts, are more slender and cook up slightly faster than regular green beans. I prefer these when they’re available. This recipe is a great way to use them, in addition to being a fast solution to dinnertime woes. We enjoyed these green beans with whipped feta on a warm evening, and washed them down with a Lillet elderflower spritz. A light meal fit for summer.

How to make this recipe

You’ll need a small food processor for this recipe, and a steamer basket for the beans, although you can also blanch them. The beans are steamed, and ready in minutes. While that is going down, you make the whipped feta. This creamy-salty spread becomes a silky foundation on which you’ll dollop the beans, after they’ve been dressed with a light shallot vinaigrette. The final touch is a garnish of chopped hazelnuts, lemon zest and chopped parsley. 

We enjoyed these green beans with whipped feta with chunks of sourdough bread. It also works well, if unorthodoxly, on freshly cooked fusili pasta. In this latter case, I chopped the beans to the same length as the pasta before using them in the recipe.

Two plates of steamed green beans plated on top of creamy whipped feta cheese, with a bowl of whipped cheese in the background

Substitutions

  • this recipe works with other green bean varieties. Yellow beans a.k.a. wax beans, purple beans, flat a.k.a. Romano beans can all be used in this recipe. Follow the weight measurement, to ensure an appropriate vegetable-to-vinaigrette ratio. Also, steam them for longer, as all other beans take longer than haricots to cook through. If you have asparagus, that will work equally well without any other substitutions, but adjusting cooking time

  • the yogurt can be dairy or vegan, and if you haven’t got either, you can use sour cream or crème fraîche

  • instead of the small shallot, use 1 tablespoon finely chopped chives or finely sliced green onions.

Something to note is that the recipe makes 2 servings. If you need to feed more than 2 adults and 1 child, as my family, then double the quantities.

Green beans with whipped feta

Yields: 2 servings

Equipment:

  • Small food processor

  • Steamer basket optional

Ingredients:

For the whipped feta spread:

  • 135 g (4.7 oz) feta cheese block or vegan feta style block

  • 2 tablespoons yogurt (dairy or vegan, both work)

  • Zest of ½ lemon plus extra for garnish if desired

  • ¼ teaspoon dry oregano

  • 1 tablespoon olive oil

For the green beans:

  • 260 g (9 oz) green French beans/haricots verts, stem ends trimmed

  • 1 tablespoon olive oil

  • ¼ teaspoon fine sea salt

  • 2 teaspoon fresh lemon juice

  • 1 small shallot walnut-sized, very finely chopped

  • 2 tablespoon finely chopped fresh parsley (chop first then measure), plus more for garnish

  • ¼ cup toasted hazelnuts or walnuts

Method:

  • Rig up a steaming setup: medium saucepan on the stove with a steaming basket inside. While the water comes to a boil, prepare the whipped feta.

  • To a small food processor add the feta (crumble it in), yogurt, lemon zest and oregano. Start blending, then slowly drizzle in the olive oil. Continue running the food processor until the mixture is creamy and there are no feta chunks left.

  • For the green beans, when the steamer water has come to a boil, add the green beans and steam, covered, for 7 minutes. At the 7 minute mark check for doneness. The beans should be cooked through but still retain their colour. Continue steaming until tender. French beans are slimmer and more tender, for regular green beans and frozen green beans, you will have to steam longer.

  • When the beans are cooked through, drain them and set aside while you make the dressing. To a bowl large enough to hold the beans, add the olive oil, salt, lemon juice, and parsley. Add the green beans and toss well to coat.

  • To serve: spread the whipped feta onto a platter or individual plates, then top with the dressed green beans. Sprinkle with the toasted chopped hazelnuts, then extra parsley. Using a microplane, grate over some lemon zest, if desired.

  • Yield: 2 as a main dish, 4 as a side dish.

Lillet elderflower spritz, for summer sipping

A summery cocktail recipe featuring herbal and floral Lillet Blanc and St. Germain elderflower liqueur, all lightened with sparkling mineral water. The perfect low-alcohol beverage for any summer gathering or solo sipping.

Summer afternoons have a languid, laid-back quality which calls for a table laid in the shade, under a canopy of climbing vines which provide much-needed shade. 

Even though I’m stuck at my desk, writing to a deadline, I can picture myself under that canopy, having had lunch, sharing a dessert and a refreshing drink with someone, bound in good conversation which, nevertheless, lulls sometimes under the combined pressure of heat and full-bellied drowsiness. 

This is how I remember summer Sunday afternoons at my grandmother’s homestead in the countryside. This drink reminds me of those afternoons, and while we never had Lillet, instead my family enjoyed our homemade rosé, lightened with a generous splash of sparkling mineral water. The wine and water both sat in a bucket of water lowered into the well to keep cool, or else in the cold cellar. Both the well and the cellar kept a steady 13 degrees C, at which drinks were refreshing but never tooth-achingly cold. 

What is this Lillet spritz made with

This spritz (spritz is a mixture of wine with sparkling water) is mellow and low in alcohol, herbal and pleasingly floral at the same time. It features Lillet Blanc, St Germain elderflower liqueur, fresh lemon juice and, or course, sparkling water. 

Lillet Blanc is a French apéritif, a fortified wine infused with botanicals, which give it a lovely aromatic, crisp quality. (More information on Lillet here) When combined with the elderflower liqueur and the lemon, its lightly floral quality is enhanced. You will also need ice, and for the sparkling mineral water component, I recommend S. Pellegrino or Perrier. 

As a garnish, I used sprigs of lemon thyme and mint, and borage flowers, all of which I have growing in my garden. The garnish is optional, but the herbs amplify the botanical notes and, in my opinion, enhance the drinking experience with their scent. Also, they’re just beautiful to look at.

Ingredient substitutions

  • Lillet Blanc – it is the main ingredient in this spritz, and I don’t recommend substituting

  • St. Germain elderflower liqueur – if you would like a drink that’s sweeter, and with an even lower alcohol content, you can swap the St Germain for elderflower cordial

  • Lemon – try a lime wedge instead of the lemon for a different, but equally aromatic version

  • Sparkling mineral water – my preferred choice is S. Pellegrino sparkling water. You can substitute club soda, or if you don’t mind a more bitter edge to your spritz, you can use tonic water. Tonic water contains quinine and so does Lillet Blanc, so they work together really well. Bitter flavours balance out sweetness, so if you are a Negroni person, or someone who does not love sweet cocktails, then tonic water might be a better choice for you.

I would love for you to play around with the proportion of ingredients in this spritz, and find the combination that you love best.

Lillet elderflower spritz

Yields: 1 serving

Ingredients:

  • 30 ml (½ oz or 2 tablespoons) St. Germain liqueur

  • 90 ml (1 ½ oz or 3 tablespoons) Lillet Blanc

  • 1 wedge of lemon

  • 90 ml (1 ½ oz or 3 tablespoons) sparkling mineral water

  • Ice

  • 1 sprig of fresh mint

  • 1 sprig of fresh lemon thyme

  • 2-3 fresh borage flowers optional

Method:

  • Fill a glass halfway up with ice. Add the liqueur and the Lillet Blanc. Squeeze the lemon wedge into the drink, and add it to the glass. Add the sparkling mineral water, then stir gently with a cocktail spoon.

  • Gently massage the mint and thyme sprig to release some of the aroma, then add them to the glass along with the borage flowers. Serve.

My top 5 tips for creating flatlays in food photography

The flatlay angle is one of the most popular angles for creating food images. Often, the top view (or bird’s eye view, as it is sometimes called) is the most effective angle in showing off to their best advantage the beautiful details of a dish.

Creating beautiful flatlays isn’t rocket science, and simply by keeping a few principles in mind, you can compose a beautiful overhead shot. After teaching photographers time and time again these same concepts, I’ve decided a dedicated post would be helpful. So here are my top 5 tips for creating scroll-stopping flatlays when shooting a food subject. If you want to go deeper into understanding composition, my Membership community (coming soon), might be for you. But for now, let’s dive in.

Tip no. 1: use lines in your composition

Think of a line as the “red thread” that connects the elements in the frame, making them make sense together. S-curves lead the eye through the frame (check this post on how to achieve that), and straight ones to “point” to your subject. You can use both actual lines (for example, the straight line created by chopstick or a rhubarb stem) or implied lines. These latter ones aren’t actual lines, but they are created by the elements in your frame. If you want to understand and learn how to compose with lines, check out my post here. For example, in the grilled peach image above, the strong line of the honey dipper points to one of the subjects, and helps guide the eye through the frame.

Tip no. 2: position elements at varying distances

Placing our subjects at varying distances from one another to create a relaxed, organic feel. When we place bowls or plates of food at equal distances, this feels staged and unnatural for the eye. Re-position the food and props if you notice things looking too rigid.

This is one of the things my students struggle with the most, because creating a composition that feels effortless actually requires a good amount of intentionality and thought. Besides a natural styling, positioning elements in varied ways around the frame is the easiest way to achieve that effortless style. In the pasta image below, this is evident when you look at the relative position of each vessel relative to one another.

Tip no. 3: avoid flat lighting

Flat lighting means you don’t have good tonal contrast in your image. If you add to much shadow fill, or use very diffused lighting, of lighting from multiple sources, your lighting can look flat and boring.

Tonal contrast means to have areas of different brightness in your image. An image with good tonal contrast will have bright well-lit areas but also shadows. Good tonal contrast adds a 3D quality to your shot and gives the brain clues about the height of objects in the frame. Notice how in the image above the light coloured background and well lit pasta contrasts with the dark interior of the pan and the rich, deep shadows. It is not only more flattering for a variety of subjects, but it also looks more natural to the eye.

Tip no. 4: layer elements and garnishes in your main dish to create interest

When you do so, you are emphasizing your main subject, drawing the eye towards it. In the red pepper and eggplant soup image below, the garnishes (we have several: yogurt, cherry tomatoes, hemp hearts, and broccoli sprouts) break up the flat surface of the soup, adding interest to the otherwise flat surface. Garnishes are perhaps the easiest way to create interest for the camera in the flatlay angle, as their textures, colour and variety not only draws the eye, but also interacts with light, creating specular highlights that make the image come alive.

Tip no. 5: include elements of different heights

For example, you can achieve this by using glasses, bowls and plates in a single image. These objects have different heights and will cast a different shadow, creating variety and interest in your image. If you have a shot with multiple plates, use a thick marble coaster underneath one or two of them. This will elevate them in an unobtrusive way, change the size/shape of their shadows, and create depth. In the bowtie pasta with kale and basil image above, we have the pan placed on a trivet, smaller bowls, and finally a nearly-flat pinch bowl.

Bonus tip: use negative space

Negative space is “empty” space in your photo, an area where you haven’t placed any of your subjects and is usually sparse, allowing the viewer’s eye to “rest” as they take in the image. This compositional tool is a favourite of mine, because it gives flatlays an open, easeful quality that I find appealing. As an additional advantage, it leaves room for text, which makes them appealing to stock photography buyers.

I hope you’ve found this suggestions useful. If you want to delve deeper into learning food photography, consider joining my Membership community (coming soon).

Until next time, and happy composing!

Using the S-curve in food photography composition

Learn to compose your food images using one of the most easy and effective composition principles.

The S-curve, also called the arabesque, is one of the most popular techniques used in food photography composition. It is one of my go-to methods when I want to position multiple elements in the frame. Below I explain what it is, and give you tips on how to use it effectively in your food scenes. 

Before I dive in, just remember that composition principles, including the S-curve, are NOT rigid rules or the letter of the law. They are tools, guidelines meant to help us build harmonious, interesting images. Use them as training wheels, and let them go when you wish.

In my previous post I wrote about lines and how to use them to style your food images. When we compose, we can use many different kinds of actual, or visible, lines: 

-straight lines, which can be vertical, horizontal, or diagonal: think chopsticks, or the rim of a baking sheet or cooling rack

-curved lines: an arugula/rocket leaf, cooked noodles, a stem of mint, the rim of a plate, or bowl etc.

But we are not limited to the lines naturally present in our food subjects or props. We can also use objects in the frame to create optical lines. These are imaginary lines created by our MIND, connecting the elements in our image in a dot-to-dot line or shape. Our brain has a natural playful tendency towards connect-the-dots games, and every image can be a fun opportunity to play. 

Take the example of the waffle image below. The plates and bowls are each a “dot” and when we connect them with a gently curved line top to bottom, we end up with an S line, hence the name of this technique.

Why use the S-curve technique

S-shaped optical lines create a sense of flow in the image, like a meandering river in a landscape. This guides the viewers’ eyes to take in all the elements in the frame. We always want to make this visual journey interesting, as well as creating the opportunity to tell the story of the hero dish with ingredients or props. This technique visually connects the objects present in our scene, and gives a sense of depth to images shot from the head-on or 45-degree angle.

Tips for using the S-curve in your food photography

  • the S-curve is great at visually connecting 4 or more elements (a.k.a. “dots”) in your frame

  • if you are shooting in the 45-degree or head-on angle, place your hero in the lower half of the frame, and the supporting elements farther back into the frame, still using the S shape, like in the tart image below

  • make sure that there is variety between the size, shape and colour of the “points” of the S-curve, otherwise the composition can feel a bit artificial, forced

  • position elements at varying distances from one another to create a relaxed, organic feel

  • Don’t make the S line too obvious, keep it natural-looking, and don’t be afraid to also position in the frame objects which are not part of the curve

  • This technique works really well for vertical orientation, though you can use it for horizontal images too

  • the arabesque works really well when the image has a good amount of negative space, just like a line is most visible on an empty page, or canvas. The viewer’s eye can rest in the unoccupied spaces of the image, which make the “dots” in the frame pop even more

If you’d like to uplevel your food images, learn alongside photographers just like you, and build confidence in your work and skills, consider joining my Membership Community, coming soon.

Lines: basic composition element in food photography

Learn how to use lines in your composition, to elevate your food images.

The most basic compositional element is our lines. If you learn how to work with lines in your culinary images, you will never struggle with your compositions. It sounds exaggerated, but it’s true. When I say “lines” I don’t just mean actual ones, like a chopstick. We have many elements in food photography which “act” as lines, such as cutlery, a long baguette, thin slices of bread like I used here, the stalks of greens, rhubarb stalks, even things like the edge of a table or the back of a chair. We use lines all the time, often unconsciously.

Take as an example the first image in this post. Each slice acts as a line. I arranged the slices of bread as vertical lines, to create a dynamic image with a lot of negative space top and bottom. The negative space balances out the bread, as the slices are placed fairly close together. The bread and tomatoes are very textured whereas the other areas are smooth. This is a way to create balance in the image: some areas will be smooth, some textured. Busy areas balanced out with negative space.

I deliberately created this flow: / \ / \ with the slices of bread. You’ll notice if you look closely. I avoid parallel lines, as they pull the eye and feel too staged. When you are placing cutlery, chopsticks, straws in drinks, aim for a natural feel and avoid placing these items parallel to one another.

Now let’s look at the same subject, positioned in a different line pattern.

In this image, the vibe is different. More slices, more busy, less negative space. The pattern of lines is similar, only done horizontally. Again, nothing lining up exactly, and each one different.

Vertical lines versus horizontal lines, and visual flow

Vertical lines move the eyes up and down through the image, whereas horizontals help move the eye side to side. Also, vertical lines convey a sense of height. Horizontal lines give a sense of calmness and stability, like a strong foundation. Diagonal lines are dynamic, and they convey a sense of energy and movement. I often compose based on a strong diagonal, as this can create beautiful flow in an image.

Lines (whether actual, or optical, a.k.a. implied) don’t need to be straight either. S-curves are a frequently used composition technique, and when elements are placed in the frame in an implied S line, this creates a visually pleasing result.

The orientation of your dominant lines in your frame can help you decide on the orientation you are shooting the image in, especially when working to the requirements of clients. Have you tried shooting a pour shot in horizontal orientation? It is an exercise in frustration.

That’s because the upper and lower edges of the frame seem to be pushing down, “squishing” the pouring action, instead of allowing it to have an expansive feel. Ask a landscape photographer and they will confirm too: the most successful images are those where the orientation (horizontal or vertical) follows the natural flow of the lines in the image.

Let’s see how this translates into the next image. I’ve kept the slices horizontal, AND changed the orientation so the frame is now in landscape (a.k.a. horizontal) orientation too.

This image feels like it flows nicely, and the direction of the slices works with our horizontal frame.

There is so much to say about lines in our food photography compositions, and I hope this post has given you some helpful insight. Leave any questions you have in the comments.

If you would like to make these (super photogenic) tartines, then here’s how to do that:

  • slice a baguette on the bias into long slices; toast if desired, but I didn’t for these images

  • spread the slices with your favourite cheese (or vegan cheesy) spread (here I used the Paysan Breton Madame Loik dairy spread, but sometimes I make my own cashew cheese; softened goat cheese works too)

  • roast cherry tomatoes like in this recipe I posted a while back

  • when the cherry tomatoes have cooled down, arrange on the bread slices

  • as a final touch, drizzle some of the lovely roasting juices over the bread. Enjoy!

Until next time!

Composition for food photography, here on the blog

If you love the way I teach food photography, or want to learn from me, I have a little announcement for you below. Read on for details.

Composition is something that didn’t come easily to me at first. In fact, years ago when I started learning and practicing photography, I struggled a lot with it. Sure, I understood the rule of thirds, but beyond blindly following “rules” I wasn’t sure how to really build a harmonious image. Nor how to avoid creating the same composition over and over.

I prepared here on the blog a series of posts focusing on composition. Lines, geometry, balance, colour – it’s not hard, and I’ll explain how I understand and apply these concepts, so that composing a shot can become an effortless and even, dare I say it, FUN exercise. 

I hope you’ll join me!